Introduction
Your project has a single dimension data flow defined. Now it’s time to complete an iterative deployment and load our target dimension. Success is only minutes away!
Required
Complete the prior three videos in this series before trying to deploy & load. After all, you need something to deploy before you can deploy, right?
Recommended
If you have a test SQL Server environment, then you’ll be able to see the final product first hand; a product dimension loaded with data. It is fine if you don’t have a test environment though. You will still be able to queue a build, and you’re free to celebrate a job well done.
Instructions
Follow along with the video to complete the following steps. Remember, we are here to help. Let us know if you get stuck, and we will quickly unstuck you. support@leapfrogbi.com
Step 1: Set Component Execution Precedence
- Navigate to https://www.leapfrogbi.com/services/data-warehouse-automation-platform/ and select Login. You will be redirected to the platform login page.
- Enter the credentials you provided when your account was created.
- Forgot your password? No problem; select the Reset Password link on the login page.
- Forgot your username? Send a request to support@leapfrogbi.com. We will look it up.
- Hover the “Deploy” top menu item and select “Precedence”.
- Click the “Auto Fill Order” button to populate the execution order values.
- Update the values for PSA duls_Product to the below.
- PhaseOrder = 20
- GroupOrder = 10
- SeriesOrder = 10
- SequenceOrder = 40
- Click “Save Current Values”. Your settings should look like the following image.

Step 2: Queue a Build
- Hover the “Deploy” top menu item and select “LC-Default Lifecycle”.
- Click the “Make Current” Button.
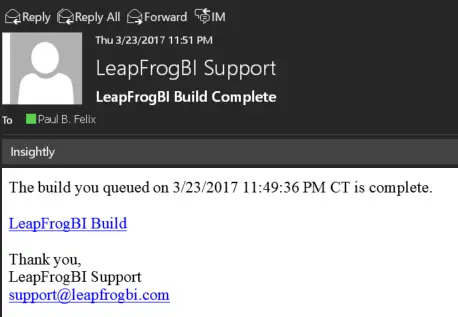
- You will receive an email when your build is complete.
- (Optional) Download the LFBI.zip archive from the “Lifecycle Archive” section of the deploy page. Save the archive to your target environment.
- (Optional ) Extract the contents of the downloaded archive to the directory path previously specified in your project’s precedence settings. Ensure that the deploy location directory path matches the location where your build assets (SSIS packages) are located.
Step 3: Create Environment Variable (optional)
If you are working in a test SQL Server environment, then create the environment variable on the server where SQL Server is running. If you do not have a SQL Server test environment to work in, then you can complete these steps on your local machine if you like or just skip this step.
- Search windows for “Environment Variables” on the machine where SQL Server is installed. You can also access environment variables by right clicking on “This PC” or “Computer” in windows file explorer and selecting “Properties”.
- Click “Advanced system settings” then click the “Environment Variables” button.
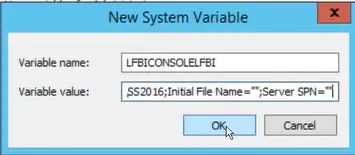
- Under the System Variables section click the “New” button.
- Copy the environment variable name from the top of the Deploy page and paste it into the environment variable name field.

- In the environment variable value input the same connection string used to generate profiles in step 2 of this training series. Change the Initial Catalog value to “CRM_Mart”. If you need help with this, don’t hesitate to ask. support@leapfrogbi.com
- Click ok to save the variable. Then click okay to the next couple windows to close out of the environment variables windows.
- In SSMS restart the SQL Server Agent by right-clicking and selecting “restart”. You may be prompted to confirm that you want to restart the agent. Select “Yes” to restart. This is required to ensure the agent service is aware of the newly created
Step 4: Deploy & Load (optional)
If you do not have a test instance of SQL Server to work in, then you will not be able to run the load process. You can still celebrate when you watch the video and you see the dimension get loaded without writing any ETL code.
- In your deploy location, run the package named “Deploy.dtsx” by double-clicking on it. The Execute Package Utility will run.
- Click “execute” to run the package. When the package is complete, close the Execute Package Utility.
- In SSMS disable the SQL Agent Job named “LFBI_Reset” by right clicking on the job name and selecting “Disable”. This job starts the load process for us and it is set to run on a schedule. Since we we only want the job to run when we manually start it, we can disable the job. Note that you may need to refresh your job list by right-clicking on the “Jobs” node and selecting refresh.
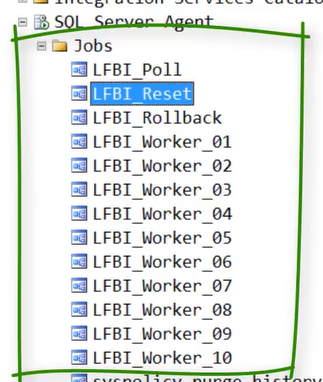
- Right click on the SQL Agent Job named “LFBI_Reset” and select “Start Job at Step”. This will start the load process.
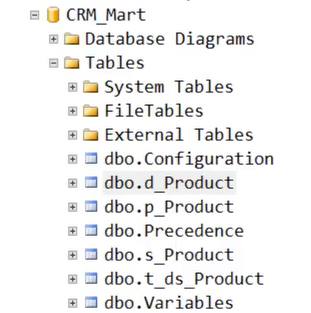
- Refresh your CRM_Mart table list by highlighting the “Table” node and clicking the refresh button in Object Explorer. Refresh the table list every few seconds. Shortly, the table named d_Product will appear. The load process is complete!
